Introduction
In Part 3, you deployed Traefik using Terraform. In this blog, you’ll continue using Terraform to deploy Traefik 2 as the reverse proxy for your OpenShift cluster. But now, you’ll secure Traefik with certificates issue by Let’s Encrypt and use Cert-Manager to help with the management of the certificates. Last, Let’s Encrypt, for reasons that will be explained later, requires a domain name so you’ll need to have a domain name.
Domain Name for Let’s Encrypt
Let’s Encrypt is a free Certificate Authority (CA) that only issues Domain-Validated SSL/TLS certificates; it does not issue Organization Validation (OV) or Extended Validation (EV) certificates. Therefore, before issuing a certificate, Let’s Encrypt validates ownership of the domain. That is to say, you need to own or control the registered domain name for the certificate. If you don’t have a registered domain name, a list, by no means exhaustive, of Domain Registrars with reasonable prices is shown below:
For example, I bought the domain name trimino.xyz and paid $0.99 USD for the first year; prices will vary depending on the top-level domain (TLD) chosen.
Let’s Encrypt
You’ll configure Traefik to use Let’s Encrypt and the ACME protocol to automatically generate certificates. Traefik requires you to define Certificate Resolvers, which are responsible for retrieving certificates from an ACME server, in the static configuration. The static configuration file can be found at values.yaml. The extracts below are from this file, unless otherwise stated; each extract relates to Let’s Encrypt and is color-coded.
Let’s examine these extracts a bit closer, starting with the certificates resolvers.
certificatesResolvers:
  # Let's Encrypt.
  le:
    # Enable ACME.
    acme:
      # email address used for registration.
      # email: 'someone@trimino.xyz'
      # Production.
      # caServer: https://acme-v02.api.letsencrypt.org/directory
      # Staging.
      caServer: https://acme-staging-v02.api.letsencrypt.org/directory
      # Match the path to persistence.
      storage: /traefik-certs/acme.json
      # Certificates' duration in hours.
      # Let's Encrypt certificates' duration defaults to 2160 hours (90 days).
      certificatesDuration: 2160
      # Preferred chain to use.
      # If the CA offers multiple certificate chains, prefer the chain with an issuer matching this
      # Subject Common Name. If no match, the default offered chain will be used.
      preferredChain: 'ISRG Root X1'
      # KeyType to use.
      # Available values: "EC256", "EC384", "RSA2048", "RSA4096", "RSA8192"
      keyType: 'RSA4096'
      dnsChallenge:
        provider: digitalocean
        # By default, the provider will verify the TXT DNS challenge record before letting ACME
        # verify. If delayBeforeCheck is greater than zero, this check is delayed for the
        # configured duration in seconds. Useful if internal networks block external DNS queries.
        delayBeforeCheck: 0
        resolvers:
          - '1.1.1.1:53'
          - '1.0.0.1:53'
          - '8.8.8.8:53'
          - '8.8.4.4:53'
The certificatesResolvers defines Let’s Encrypt (le); le enables the ACME server.
The email address that is used for registration will be set in the section Issuer (ACME).
The CA server. The staging environment (default) will not issue trusted certificates, but it is used to ensure that the verification process is working properly before moving to production. The production environment imposes much stricter rate limits; hence, to reduce the chance of you hitting those limits, it is highly recommended to start by using the staging environment.
The storage option sets the location where your ACME certificates are saved. ACME certificates are stored in a JSON file that needs to have a 600 file mode.
When you receive a certificate from Let’s Encrypt, its servers use challenges to validate that you control the domain name in the certificate. This configuration uses
- The DNS-01 Challenge, which is mandatory for wildcard certificate generation.
- The provider Digital Ocean is used for automating the Domain Name System (DNS) Server verification. For a list of supported providers, go here.
- The DNS servers use to resolve hostnames to IP addresses:
Cloudflare -> 1.1.1.1,1.0.0.1
Google -> 8.8.8.8,8.8.4.4
The Authoritative DNS servers store the most recent and accurate information (DNS records) for a domain and are able to provide the final answers for users’ DNS queries (DNS lookups). To get the Authoritative DNS servers for a domain:
$ nslookup -type=NS trimino.xyzor
$ dig +short NS trimino.xyzTo check DNS propagation, from a browser:
https://dnschecker.org/
or
https://www.whatsmydns.net/
The next extract enables Persistent Volume Claims to persist certificates.
# Persistent Storage.
persistence:
  enabled: true
  name: traefik-certs
  accessMode: ReadWriteOnce
  size: 1Gi
  path: /traefik-certs
  annotations: {}
The path property matches the value used in the certificatesResolvers.le.acme.storage property above.
Next, SSL/TLS is enabled through the HTTP options of an Entrypoint; any Ingress attached to this Entrypoint will have SSL/TLS termination by default. See Ingress Controller for more information.
entryPoints:
  # Traefik will listen to incoming request on the port 80 (http).
  web:
    address: ':80'
    # Targeted entry point of the redirection.
    http:
      redirections:
        entrypoint:
          to: websecure
          # Scheme used for the redirection.
          scheme: https
          # Apply a permanent redirection.
          permanent: true
  # Traefik will listen to incoming request on the port 443 (https).
  websecure:
    address: ':443'
    http:
      # Default TLS configuration for the routers linked to the entry point.
      tls:
        # Default certificate resolver for the routers linked to the entry point.
        certResolver: le
And in the last extract, a default certificate resolver is set.
ports:
  traefik:
    ...
  web:
    ...
  websecure:
    port: 8443
    expose: true
    exposedPort: 443
    protocol: TCP
    tls:
      enabled: true
      # (Optional) Set a default certificate resolver.
      certResolver: le
  metrics:
    ...
Finally, if you are having trouble issuing a certificate, Let’s Debug is a diagnostic tool for Let’s Encrypt that helps identifying a variety of issues.
module “cert-manager”
cert-manager is a powerful and extensible X.509 certificate management for Kubernetes and OpenShift. It will obtain certificates from a variety of issuers; it ensures the certificates are valid and up-to-date; and it will attempt to renew certificates at a configured time before expiry. On the other hand, Traefik is capable of handling certificates in your cluster, but only when there is a single pod of Traefik running. This, of course, is not acceptable because this pod becomes a single point of failure in the infrastructure. To solve this issue, you’ll use cert-manager to request, issue, renew, and store your certificates.
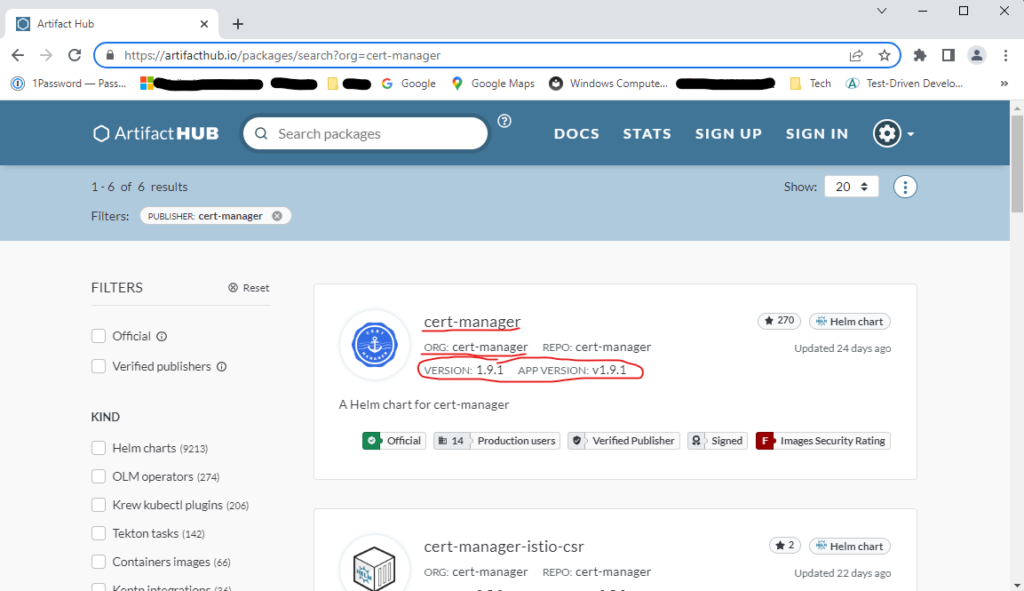
Since cert-manager provides Helm charts as a first-class method of installation for both Kubernetes and OpenShift, you’ll be using Helm charts for the installation. You can find the Terraform module for installing cert-manager here, and you can obtain the latest chart version at this location or by visiting the page shown in Figure 1.
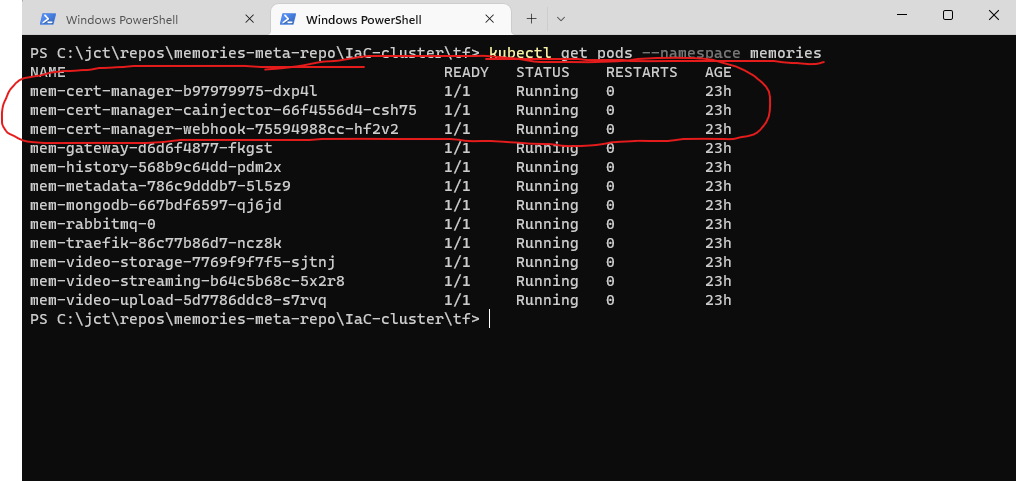
Once cert-manager is deployed (see the bootstrap.tf file), you can verify it is deployed correctly by ensuring the pods cert-manager, cert-manager-cainjector, and cert-manager-webhook are in the Running state and the proper namespace. To verify the status of the pods, execute
PS C:\jct\repos\memories-meta-repo\IaC-cluster\tf> kubectl get pods --namespace memoriesFigure 2 shows the output of the command.
module “acme-issuer”
The Automated Certificate Management Environment (ACME) protocol is a communications protocol for automating interactions between certificate authorities and their users’ web servers; it allows the automated deployment of public key infrastructure at very low cost. It was designed by the Internet Security Research Group (ISRG) for its Let’s Encrypt service. The ACME Issuer type represents a single account registered with the ACME Certificate Authority server. When you create a new ACME Issuer, cert-manager will generate a private key, which is used to identify you with the ACME server. Just keep in mind that since an Issuer is a namespaced resource, it is not possible to issue certificates from an Issuer in a different namespace.
The module acme-issuer can be found here. The extract below is from this file and is color-coded.
resource "kubernetes_manifest" "acme-issuer" {
  manifest = {
    apiVersion = "cert-manager.io/v1"
    kind = "Issuer"
    metadata = {
      name = var.issuer_name
      namespace = var.namespace
      labels = {
        app = var.app_name
      }
    }
    spec = {
      acme = {
        # Email address used for ACME registration.
        email = var.acme_email
        # The ACME server URL; it will issue the certificates.
        server = var.acme_server
        # Name of the K8s secret use to store the ACME account private key.
        privateKeySecretRef = {
          name = "le-acme-private-key"
        }
        solvers = [
          # ACME DNS-01 provider configurations.
          {
            # (Optional) An empty 'selector' means that this solver matches all domains.
            # Only use digitalocean to solve challenges for trimino.xyz and www.trimino.xyz.
            selector = {
              dnsNames = var.dns_names
            }
            dns01 = {
              digitalocean = {
                tokenSecretRef = {
                  name = kubernetes_secret.secret.metadata[0].name
                  key = "access-token"
                }
              }
            }
          }
        ]
      }
    }
  }
}
The email for ACME registration; see section Let’s Encrypt certificatesResolvers.le.acme.email. Let’s Encrypt will use this email to contact you about expiring certificates and issues related to your account.
The ACME server issuing the certificates. Let’s Encrypt has two different services, one for staging (letsencrypt-staging) and one for production (letsencrypt-prod).
Secret resource use to store the account’s private key.
As detailed in the RFC8555, cert-manager offers two challenge validations; viz. HTTP01 and DNS01. You’ll be using the latter with Digital Ocean as the DNS provider. The ACME Issuer supports a number of different DNS providers.
module “certificate”
cert-manager can be used to obtain certificates from a CA using the ACME protocol. A certificate is a namespaced resource that references an Issuer or ClusterIssuer and defines a desired X.509 certificate that will be renewed and kept up to date. You can read more on how to configure your Certificate resource here; a full list of the fields supported by the Certificate resource can be found in the API reference documentation. Below you’ll find a short description of a few selected fields:
isCA – It marks the Certificate as valid for certificate signing. This will automatically add the cert sign usage to the list of usages. See the Basic Constraints section of RFC5280.
privateKey.rotationPolicy – Setting this field to Always will not rotate the private key immediately. In order to rotate the private key, the certificate objects must be reissued.
commonName and dnsNames – The certificate commonName and dnsNames are challenged by the ACME server. The certificate manager service automatically creates a pod and ingress rules to resolve the challenges. (The use of the common name field has been deprecated since 2000 and is discouraged from being used.)
duration and renewBefore – The default duration for all certificates is 90 days, and the default renewal window is 30 days. That is, certificates are considered valid for 3 months and renewal will be attempted within 1 month of expiration.
secretName – The signed certificate will be stored in a Secret resource in the same namespace as the Certificate once the issuer has successfully issued the requested certificate.
Although the code for the module certificate should already be familiar to you, nonetheless, you should take the time to understand it as well as the code for invoking the module from within the bootstrap.tf file.
Troubleshooting Certificates
When troubleshooting cert-manager, you’ll want to use the kubectl describe command before proceeding to the logs. The command gives you information about the resources as well as recent events. On the other hand, the logs are quite verbose and should only be used if the command does not provide the required information. The following commands are useful for troubleshooting problems when issuing ACME certificates:
$ kubectl get svc,pods -n <namespace>
$ kubectl get Issuers,ClusterIssuers,Certificates,CertificateRequests,Orders,Challenges -n <namespace>
$ kubectl get Issuers,ClusterIssuers,Certificates,CertificateRequests,Orders,Challenges --all-namespaces
$ kubectl describe Issuers,ClusterIssuers,Certificates,CertificateRequests,Orders,Challenges -A

To check the certificate:
$ kubectl -n <namespace> describe certificate <certificate-name>
$ kubectl -n <namespace> delete certificate <certificate-name>
$ kubectl -n <namespace> describe certificate <certificate-name>
$ kubectl -n <namespace> delete certificate <certificate-name>

To describe a specific resource (the resource name can be obtained from the kubectl get command):
$ kubectl describe Issuer <issuer-name> -n <namespace>
$ kubectl get ingressroute -A
$ kubectl get ingress -n <namespace>

To delete a pending Challenge, see here and here. As per documentation, the order is important!!!
$ kubectl delete Issuer <issuer-name> -n <namespace>
$ kubectl delete Certificate <certificate-name> -n <namespace>
Middlewares
In Part 3, you were introduced to middlewares; more specifically to the dashboard middleware. Now, you’ll be introduced to the other middlewares used in this implementation of Traefik. But first, let’s revisit what middlewares are: In Traefik, middlewares are attached to routers as a means of tweaking the requests before they are forwarded to the appropriate service or before the answers from the service are sent to the client. Bearing this in mind, a list with a short description of each middleware used in this implementation is given below. Of course, you can add or subtract from this list as required by your implementation. Finally, to gain a deeper understanding of Traefik, if so desired, you should make an effort to understand the code associated with these middlewares.
mem-mw-compress – It compresses responses before sending them to the client; it uses the gzip compression.
mem-mw-dashboard-basic-auth – It uses basic authentication with SSL/TLS for the dashboard.
mem-mw-gateway-basic-auth – It uses basic authentication with SSL/TLS for the application.
mem-mw-rate-limit – It ensures that services will receive a fair amount of requests and allows you to define what fair is.
mem-mw-redirect-https – It redirects the request if the request scheme is different from the configured scheme; this implementation uses the EntryPoint redirection.
mem-mw-security-headers – It manages the headers of requests and responses.
Note: HTTP Basic Authentication is a simple challenge/response mechanism with which a server can request authentication information (a user ID and password) from a client. The client passes the authentication information to the server in an Authorization header. The authentication information is base-64 encoded; it is not encrypted.
This scheme can be considered secure only when the connection between the web client and the server is secure. If the connection is insecure, the scheme does not provide sufficient security to prevent unauthorized users from discovering the authentication information for a server. If you think that the authentication information might be intercepted, use basic authentication with SSL/TLS encryption to protect the user ID and password.
Traefik supports passwords hashed with MD5, SHA1, or BCrypt. In the middlewares mem-mw-dashboard-basic-auth and mem-mw-gateway-basic-auth, the secret resource uses the bcrypt function, which is included as part of Terraform’s built-in functions. You should keep in mind that a bcrypt hash value includes a randomly selected salt, and, therefore, each call to this function will return a different value, even if the given string and cost are the same.
And just as a side note, you can use the htpasswd utility from the command line to encrypt a password. You must install (the instructions below are for ubuntu) the utility, which is part of the apache2-utils package to manage usernames and passwords.
$ sudo apt update
$ sudo apt install apache2-utils

The output of the utility will be piped to openssl for base64 encoding.
$ htpasswd -nbB <username> <password> | openssl base64

To verify the output.
$ echo <Output from htpasswd> | base64 -d
module “tlsoptions”
The TLS options allow you to configure some parameters of the TLS connection. For more information, you should refer the documentation and the code for the module tlsoption.
module “tlsstore”
In Traefik, certificates are grouped together in certificates stores, and the TLS Store allows you to configure the default TLS store. As with the TLS options, you should refer the documentation and the code for the module tlsstore.
module “ingress-route”
An Ingress (entryway) exposes HTTP and HTTPS routes from outside the cluster to services within the cluster. Traffic routing is controlled by rules defined on the Ingress resource. An Ingress operates at the application layer of the network stack (for example HTTP) and can provide features that a service cannot. But in order to make an Ingress resource work, an Ingress controller needs to be running in the cluster. Different Kubernetes environments use different implementations of the controller, and several do not provide a controller at all. OpenShift uses an Ingress controller that is based on HAProxy, and in this application, it is being replaced with Traefik.
The extracts below are from the module ingress-route. The first extract is a list of entry points names. If not specified, HTTP routers will accept requests from all defined entry points. If you want to limit the router scope to a set of entry points, set the entryPoints option. As per the settings below, Traefik will handle requests using the web (HTTP) and websecure (HTTPS) entrypoints.
...
entryPoints = [  # Listening ports.
  "web",
  "websecure"
]
...
Next, you have a list of routes that are used by Traefik to forward the requests to the middlewares, if any, and services, as defined in each Rule. For an explanation of the other fields (match, priority, etc.), please go here.
...
routes = [
  {
    kind = "Rule"
    match = "Host(`${var.host_name}`, `www.${var.host_name}`) && (Path(`/upload`) || Path(`/api/upload`))"
    priority = 50
    middlewares = [
      {
        name = var.middleware_rate_limit
        namespace = var.namespace
      },
      {
        name = var.middleware_security_headers
        namespace = var.namespace
      }
    ]
    services = [
      {
        kind = "Service"
        name = var.svc_gateway
        namespace = var.namespace
        port = 80  # K8s service.
        weight = 1
        passHostHeader = true
        responseForwarding = {
          flushInterval = "100ms"
        }
        strategy = "RoundRobin"
      }
    ]
  },
...
And the final extract defines the TLS certificate configuration. When a TLS section is specified, it instructs Traefik that the current router is dedicated to HTTPS requests only (and that the router should ignore HTTP (non-TLS) requests). Traefik will terminate the SSL/TLS connections (meaning that it will send decrypted data to the services). Below you’ll find a short description of each field under the tls section:
certResolver – Although you can configure Traefik Proxy to use multiple certificatesResolvers, an IngressRoute is only ever associated with a single one.
domains[].sans[] – Subject Alternative Name (SAN) is an extension to the X.509 specification that allows you to secure multiple domains with a single SSL/TLS certificate. You may include any combination of domain names, subdomains, IP addresses, and local host names up to a maximum of 250 (vendor specific).
SAN is a very useful tool to fix the www versus the root domain (no-www) problem. For example, if you issued an SSL/TLS certificate for www.trimino.xyz, it will only work for www.trimino.xyz, but not for the root domain trimino.xyz. By adding a SAN value of trimino.xyz to the certificate, it fixes problem. The converse of this works as well; i.e., you can add a SAN value of www.trimino.xyz for a certificate issued just for the root domain trimino.xyz.
secretName – It defines the secret name used to store the certificate created by cert-manager to terminate the SSL/TLS connection (in the IngressRoute namespace).
store – The certificates store. Any store definition other than the default store (named default) will be ignored; hence, there is only one globally available TLS store.
options – Traefik provides several TLS options to configure some parameters of the TLS connection. To perform an analysis of your TLS configuration, the service from SSLLabs provides a detailed color-coded report of various aspects of TLS. If you decide to use the service, you should perform a before and after analysis; i.e., you perform an analysis before enabling the TLS options, and after enabling the TLS options, you perform a second analysis. Then, you can compare the two reports.
tls = {
  certResolver = "le"
  domains = [
    {
      main = var.host_name
      sans = [  # URI Subject Alternative Names
        "www.${var.host_name}"
      ]
    }
  ]
  secretName = var.secret_name
  store = {
    name = var.tls_store
  }
  options = {
    name = var.tls_options
    namespace = var.namespace
  }
}
Finally, you’ll find a few useful commands for troubleshooting the ingress controller below.
$ kubectl get all -n <namespace>
$ kubectl get all -l=<label-name>=<label-value> -n <namespace>
$ kubectl get ingressroute -n <namespace>
$ kubectl describe ingressroute <ingress-route-name> -n <namespace>
$ kubectl describe ingressroute <ingress-route-name> -A
$ kubectl get ingress -A
module “traefik”
As you may recall, in Part 3, section module “traefik”, you were introduced to the traefik module. In this section, you’ll add to this module the secret resource that is required to secure Traefik with SSL/TLS certificates; below is the secret resource that is used to protect the access token for the DNS provider (Digital Ocean).
# See 'env:' in ./modules/traefik/traefik/util/values.yaml.
resource "kubernetes_secret" "secret" {
  metadata {
    name = "${var.service_name}-provider-secret"
    namespace = var.namespace
    labels = {
      app = var.app_name
    }
  }
  # Plain-text data.
  data = {
    api_auth_token = var.api_auth_token
  }
  type = "Opaque"
}
This secret (mem-traefik-provider-secret) is used in the file values.yaml as show below.
# Environment variables to be passed to Traefik's binary.
env: [
  {
    name: DO_AUTH_TOKEN,
    valueFrom: {
      secretKeyRef: {
        name: mem-traefik-provider-secret,
        key: api_auth_token
      }
    }
  }
]
And with these changes, you’ll have a secure Traefik reverse proxy.
variables_no_push.tf
In Part 3, section variables_no_push.tf, you added to this file a username and password to access the traefik dashboard. Now, you’ll add a username and password to access the application as well as an access token for the DNS provider.
#############################################################################################################
# Usage Note:                                                                                               #
# (1) Make a copy of this file.                                                                             #
# (2) Rename the file to "variables_no_push.tf".                                                            #
#     Renaming the file to "variables_no_push.tf" will ensure that the file will not be pushed to the repo. #
# (3) In the "variables_no_push.tf" file, add the appropriate information to each variable.                 #
#############################################################################################################
# IMPORTANT: Because the variables_no_push.tf file contains confidential information, do not push this file #
#            to a version control system. This file is meant to be on your local system only.               #
#############################################################################################################
# GLOBAL VARIABLES #
####################
variable ibmcloud_api_key {
  description = "The IBM Cloud platform API key."
  default = "***********"
  sensitive = true
}

variable cluster_name {
  description = "The name of an existing IBM Cloud cluster."
  default = "***********"
  sensitive = true
}

variable resource_group_name {
  description = "The name of the IBM Cloud resource group in which resources should be created."
  default = "***********"
  sensitive = true
}

variable region {
  description = "The IBM Cloud region where all resources will be deployed; e.g., us-south, eu-de, etc."
  default = "***********"
  sensitive = true
}

variable ibmcloud_timeout {
  description = "The timeout, expressed in seconds, for interacting with IBM Cloud APIs."
  default = "900"
  sensitive = true
}

###########
# Traefik #
###########
variable traefik_dashboard_username {
  default = "***********"
  sensitive = true
}

variable traefik_dashboard_password {
  default = "***********"
  sensitive = true
}

variable traefik_gateway_username {
  default = "***********"
  sensitive = true
}

variable traefik_gateway_password {
  default = "***********"
  sensitive = true
}

variable traefik_le_email {
  default = "***********"
  sensitive = true
}

variable traefik_dns_api_token {  # digital ocean
  default = "***********"
  sensitive = true
}
Deploying Traefik Securely
Once the changes that are described above are applied, you can deploy your application using Traefik as the reverse proxy with Basic Authentication (credentials are base64 encoded but not encrypted, see RFC7617) over SSL/TLS (HTTPS). However, since you are using the Traefik Community Edition, only a single instance of Traefik with Let’s Encrypt is supported, and, by extension, a single point of failure is introduced to the deployment. (Traefik Enterprise Edition with Let’s Encrypt supports High Availability (HA).) For a workaround to the Community Edition HA issue, please read the LetsEncrypt Support with the Custom Resource Definition Provider.
To build and bootstrap your app, you’ll need to invoke the Terraform commands below in the order given. Please refer to Part 3, section Building and Deploying Traefik, for an explanation of these and a few other useful commands.
PS C:\jct\repos\memories-meta-repo\IaC-cluster\tf> terraform init
PS C:\jct\repos\memories-meta-repo\IaC-cluster\tf> terraform apply -var="app_version=1.0.0" -auto-approve
PS C:\jct\repos\memories-meta-repo\IaC-cluster\tf> terraform apply -var="app_version=1.0.0" -var="k8s_manifest_crd=true" -auto-approve
Finally, when selecting the app to build and deploy, you have two choices: (1) the whoami app or (2) the memories app. The whoami app will build and deploy much quicker than the memories app since it is much simpler. To build and deploy the whoami app, you’ll need to make the changes that are described below to the file bootstrap.tf.
Uncomment the module whoami.

###################################################################################################
# whoiam                                                                                          #
###################################################################################################
# /*** # web service app for testing Traefik
module "whoiam" {
  count = var.k8s_manifest_crd ? 0 : 1
  source = "./modules/traefik/whoami"
  app_name = var.app_name
  app_version = var.app_version
  namespace = local.namespace
  service_name = "mem-whoami"
}
# ***/ # Web service

...

Comment the following modules.

###################################################################################################
# mongodb                                                                                         #
###################################################################################################
/*** mongodb - deployment
# Deployment.
module "mem-mongodb" {
  count = var.k8s_manifest_crd ? 0 : 1
  source = "./modules/mongodb-deploy"
  app_name = var.app_name
  ...
  service_port = 27017
  service_target_port = 27017
}
***/  # mongodb - deployment

...

###################################################################################################
# rabbitmq                                                                                        #
###################################################################################################
/*** rabbitmq - statefulset
# StatefulSet.
module "mem-rabbitmq" {
  count = var.k8s_manifest_crd ? 0 : 1
  source = "./modules/rabbitmq-statefulset"
  app_name = var.app_name
  ...
  service_name = local.svc_rabbitmq
}
***/  # rabbitmq - statefulset

...

###################################################################################################
# Application                                                                                     #
###################################################################################################
/*** app
module "mem-gateway" {
  count = var.k8s_manifest_crd ? 0 : 1
  # Specify the location of the module, which contains the file main.tf.
  source = "./modules/deployment"
  ...
}

...

module "mem-video-upload" {
  count = var.k8s_manifest_crd ? 0 : 1
  source = "./modules/deployment"
  ...
  service_name = local.svc_video_upload
}
***/ # appConclusion
Securing Traefik has been a long journey, but I hope that it has been a productive journey. You can now use Traefik as the reverse proxy and can secure the application with Basic Authentication over HTTPS; furthermore, you are using certificates that are issued by Let’s Encrypt and are managed by Cert-Manager. What’s next? In Part 5, you will deploy using Terraform the ELK Stack in an OpenShift cluster; ELK is the acronym for three open source projects: Elasticsearch, Logstash, and Kibana. The stack is used to store, search, analyze, and visualize data from any source, in any format, in real-time.
Nice post. I used to be checking continuously this blog and I am impressed!
Very helpful info specifically the final part 🙂 I maintain such info much.
I was looking for this certain information for a very lengthy time.
Thanks and good luck.